
.svg)


.svg)

Oracle Cloud Infrastructure (OCI)
Overview
The Oracle Cloud Infrastructure (OCI) Integration allows Cywift to securely connect with OCI tenancies to collect cloud asset inventory, configuration information, identity metadata, security posture details, and compliance evidence.
Before starting the integration, ensure the following:
• OCI Console access
• Tenancy OCID
• User OCID
• API Signing Key
• Key Fingerprint
• Required read-only policy permissions
• Collector configured in Cywift
Step 1: Create OCI Credentials
To create credentials for Oracle Cloud:
- Log in to your Oracle Cloud Console and navigate to Administration → Tenancy Details.
- • Copy the Tenancy OCID.
- Navigate to Identity → Users.
- • Click Create User.
• Enter CloudSploit as the user name.
• Enter CloudSploit API Access in the description field.
• Click Create.
• Copy the User OCID. - Generate an API Signing Key by following Oracle Cloud documentation.
- Open the public key file (oci_api_key_public.pem) in a text editor.
- • Copy the entire public key content.
- In Oracle Cloud, click Add Public Key.
- • Paste the public key.
• Click Add.
• Copy the generated Fingerprint. - Open the private key file (oci_api_key.pem) in a text editor.
- • Copy and securely save the private key contents.
- Navigate to Identity → Groups.
- • Click Create Group.
• Enter SecurityAudit as the group name.
• Enter CloudSploit Security Audit Access in the description.
• Click Submit. - Add the CloudSploit API User to the SecurityAudit group.
- Navigate to Identity → Policies.
- • Click Create Policy.
• Enter SecurityAudit as the policy name.
• Enter CloudSploit Security Audit Policy in the description.
• Add the following policy statement: - ALLOW GROUP SecurityAudit to READ all-resources in tenancy
- • Click Create.
- Navigate to Identity → Compartments.
• Select the root compartment or the compartment being audited.
• Copy the Compartment OCID if required.
Important Notes:
• Store private keys securely
• Do not share API signing keys
• Use a dedicated OCI user for integrations
• Apply least-privilege access whenever possible
Step 2: Navigate to Integrations in Cywift
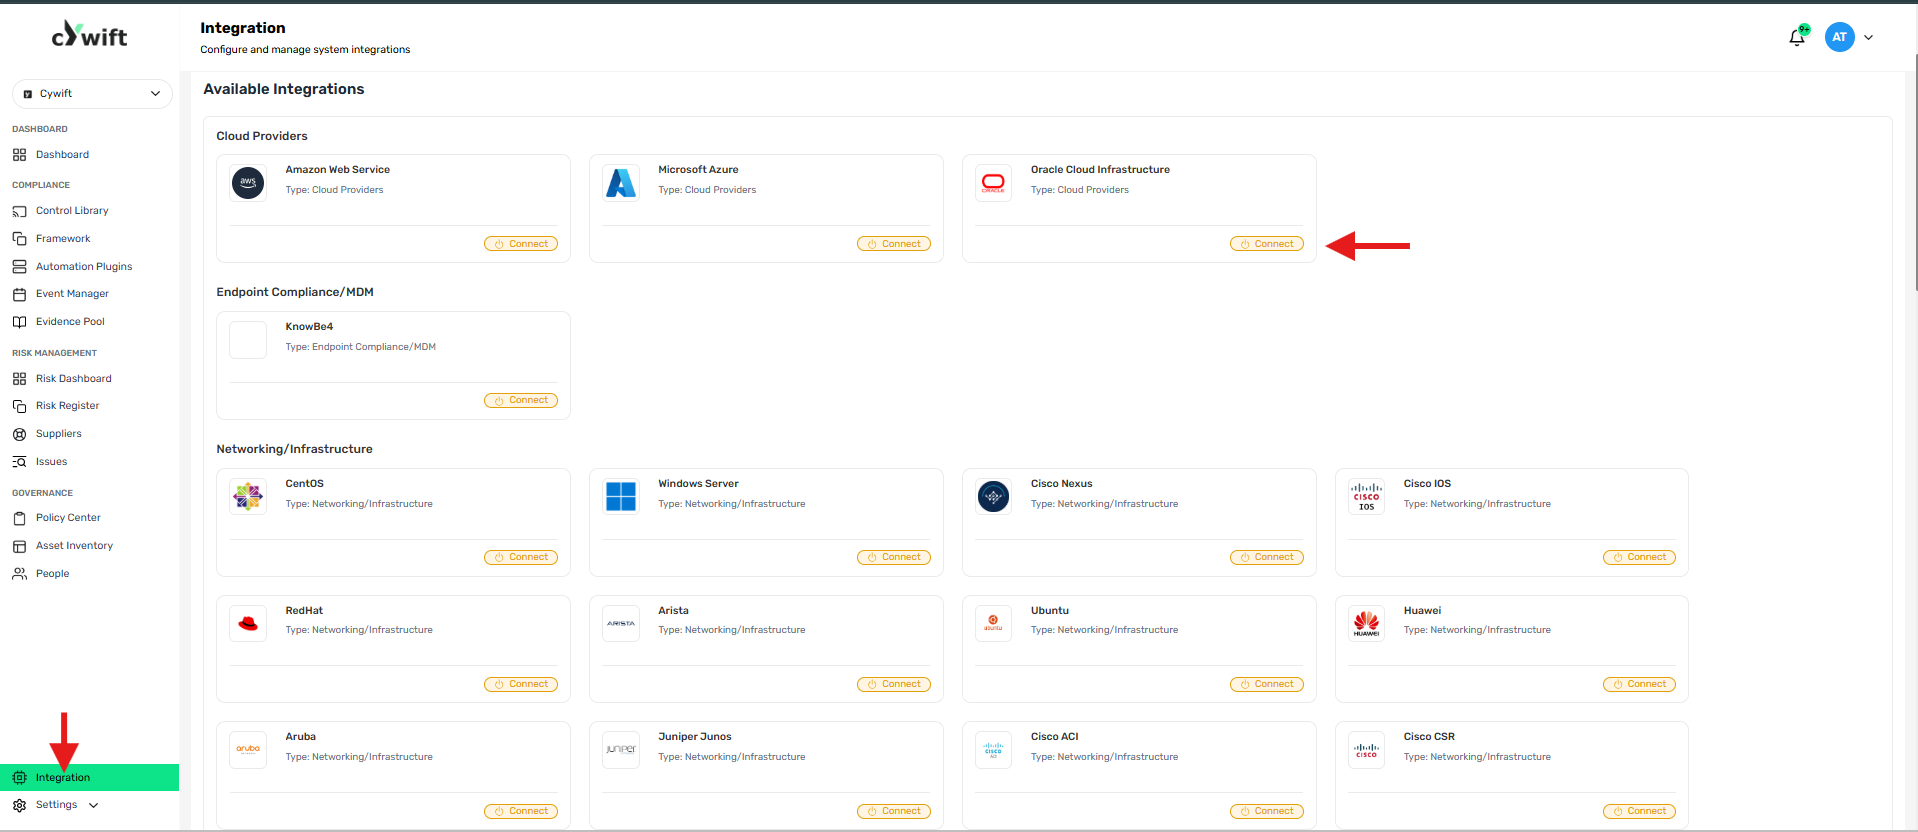
• Log in to the Cywift Platform
• Navigate to Integration
• Select Cloud Providers
• Choose Oracle Cloud Infrastructure (OCI)
• Click Add Integration
Step 3: Add Individual Integration
Use this option when integrating a single OCI tenancy.
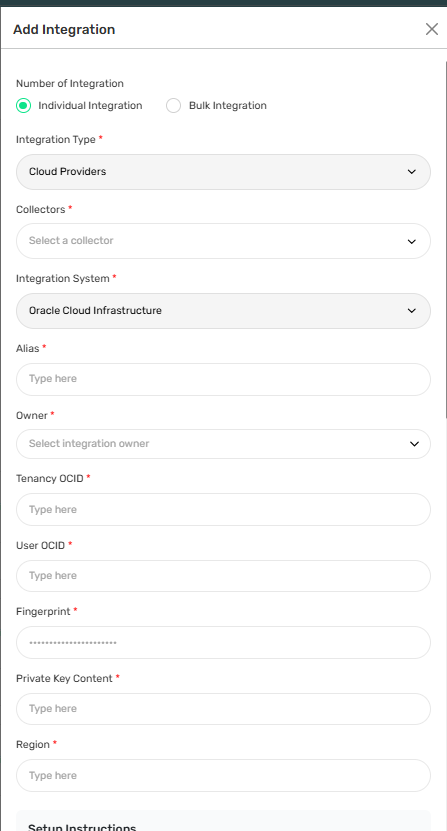
Required Fields:
• Select Individual Integration
• Select Oracle Cloud Infrastructure (OCI) from Cloud Providers
• Select a configured Collector
• Enter an Integration Alias
• Select an Integration Owner
• Enter the Tenancy OCID
• Enter the User OCID
• Enter the API Key Fingerprint
• Enter the Private Key
Step 4: Add Bulk Integration
Use this option to integrate multiple OCI tenancies.
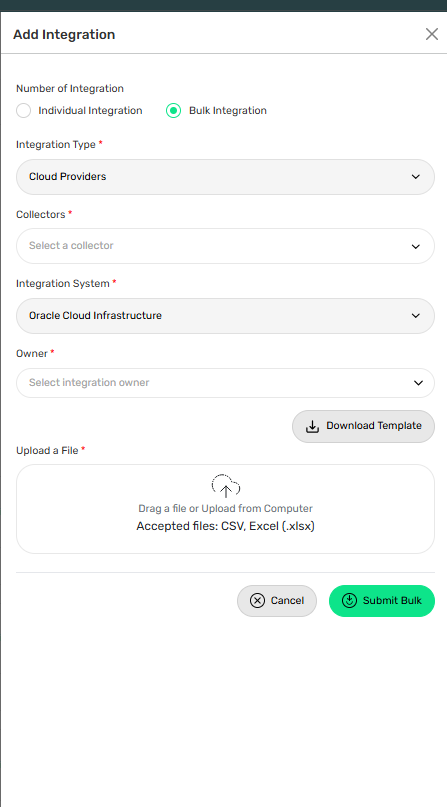
Steps:
• Select Bulk Integration
• Download the template
• Enter the required OCI credential details
• Upload the completed file
• Click Test Connection
• Save the integration
Troubleshooting Tips
• Verify Tenancy OCID and User OCID
• Confirm the API key fingerprint is correct
• Check the private key format and contents
• Validate OCI policy permissions
• Ensure collector connectivity to OCI services
