
.svg)


.svg)

User Authentication Settings
Overview
User Authentication Settings allow individual users to manage how they authenticate when signing in to the Cywift GRC Platform. These settings are user-specific, apply only to the logged-in account, and are available based on the organization’s global authentication configuration.
Who Can Access User Authentication Settings
- All users
- Each user can manage their own security and authentication settings
Navigation Steps
Follow the steps below to access User Authentication Settings:
- Log in to the Cywift GRC Platform.
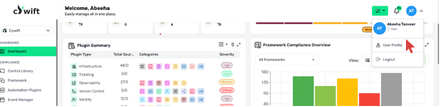
- Click on your Profile icon.
- Select User Profile from the menu.
- Click on Security Settings.
- You will now see User Authentication Settings, including:
- Password settings
- Passkeys
- Two-Factor Authentication (2FA)
- Email authentication
- Trusted devices
- You can also select preferred authentication method
.png)
Face ID Detection (Biometric)
Purpose: Enable device biometric login for supported devices/browsers.
Steps:
- Go to Profile → Face ID Detection.
- Click Enable Face ID and follow device/browser prompt.
- Complete OS-level biometric enrollment if needed.
.png)
Passkey Settings (FIDO2)
Purpose: Register passkeys (e.g., Windows Hello, macOS Keychain, security keys).
Limits: Up to 5 passkeys per user (configurable).
Steps:
- Profile → Passkey Settings → Add Passkey.
- Follow browser/device prompts to register the passkey.
- Label passkey for easy identification.
Management: Users can remove or add passkeys from this screen.
.png)
Two-Factor Authentication (2FA)
Purpose: Add additional verification step during sign-in.
2FA Methods Supported: Email Code (OTP), passkey + password combos depending on global config.
Enable 2FA (user flow):
- Profile → Two-Factor Authentication.
- Select preferred method (if multiple enabled).
- Scan QR Code or Enter Key
You will be prompted to connect an Authenticator App.
You can use apps such as:
- Google Authenticator
- Microsoft Authenticator
- For Email Code: confirm the registered email address.
- For passkey-based 2FA: register an additional passkey or use an existing one.
Recovery: Provide backup codes or admin recovery flow (documented separately).
.png)
Email Authentication (Enable / Disable / Reset)
Purpose: Configure email-based login or 2FA delivery.
Actions:
- Enable Email Authentication: toggles receiving OTPs via email.
- Reset: re-verify the email address.
- Disable: turns off email-based delivery if alternate methods are in use.
Note: Ensure mail server settings are validated to avoid delivery failures.
.png)
Idle Timeout (minutes)
Purpose: Determine inactivity timeout before automatic logout.
User action: Users can request a shorter session but cannot exceed the global maximum.
Steps: Profile → Idle Timeout → Enter value (minutes) → Save.
.png)
Anti-Phishing Code
Purpose: A short code or phrase displayed in all legitimate system emails. Users use it to verify authenticity.
Steps : Profile → Anti-Phishing Code → Add Code.
Best practice: Keep the code unique, do not reuse common words.
.png)
Trusted Devices
Purpose: Allow users to mark devices as trusted to reduce re-authentication frequency.
Limits: Up to 3 trusted devices by default (configurable).
Add/remove: Profile → Trusted Devices → Add or Revoke.
