
.svg)


.svg)

Microsoft Azure
Overview
The Microsoft Azure Integration allows Cywift to securely connect with Azure subscriptions and tenants to collect cloud asset inventory, configuration details, identity metadata, policy information, and security posture evidence.
Before starting the integration, ensure the following:
• Azure portal access
• Azure tenant access
• App registration permissions
• Client ID, Tenant ID, and Client Secret
• Required read-only permissions assigned
• Collector configured in Cywift
Step 1: Create Azure Credentials
To create credentials for Azure:
- Go to Enterprise Applications and click New Application.
- • Select Create your own application.
• Enter the application name Cywift.
• Click Create. - Go to App Registrations.
- • Click New Registration.
• Enter the application name Cywift.
• Click Register. - In the Overview section:
- • Copy the Application (Client) ID.
• Copy the Directory (Tenant) ID. - Go to Certificates & Secrets.
- • Click New Client Secret.
• Enter the description Cywift.
• Select the expiry date.
• Click Add.
• Copy and save the Client Secret Value. - Go to API Permissions.
- • Click Add a permission.
• Assign the required read permissions.
• Click Add permissions.
Important Notes:
• Use a dedicated app registration for Cywift
• Store the client secret securely
• Assign only the minimum required permissions
• Rotate client secrets periodically
Step 2: Navigate to Integrations in Cywift
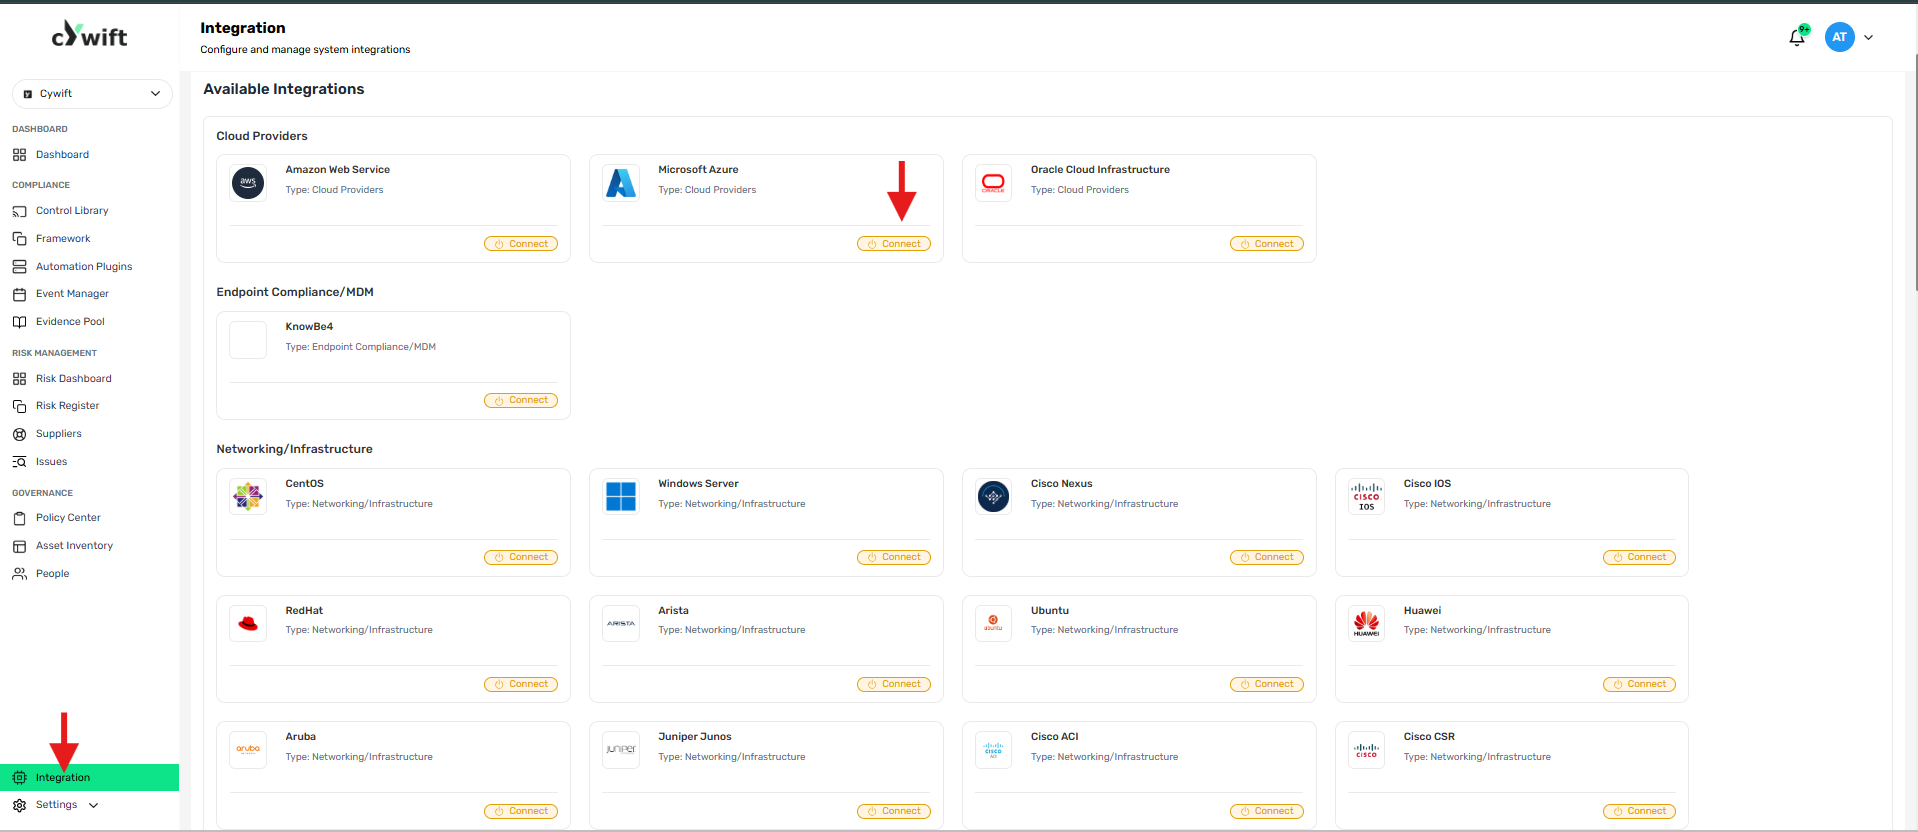
• Log in to the Cywift Platform
• Navigate to Integration
• Select Cloud Providers
• Choose Microsoft Azure
• Click Add Integration
Step 3: Add Individual Integration
Use this option when integrating a single Azure tenant.
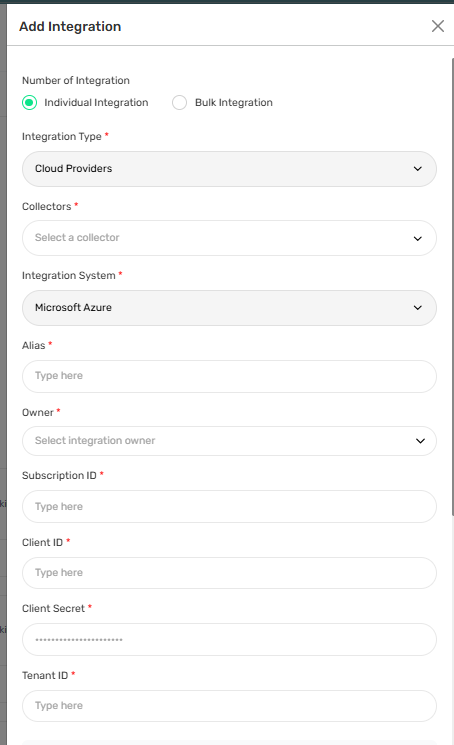
Required Fields:
• Select Individual Integration
• Select Microsoft Azure from Cloud Providers
• Select a configured Collector
• Enter an Integration Alias
• Select an Integration Owner
• Enter the Tenant ID
• Enter the Client ID
• Enter the Client Secret
Step 4: Add Bulk Integration
Use this option to integrate multiple Azure tenants or subscriptions.
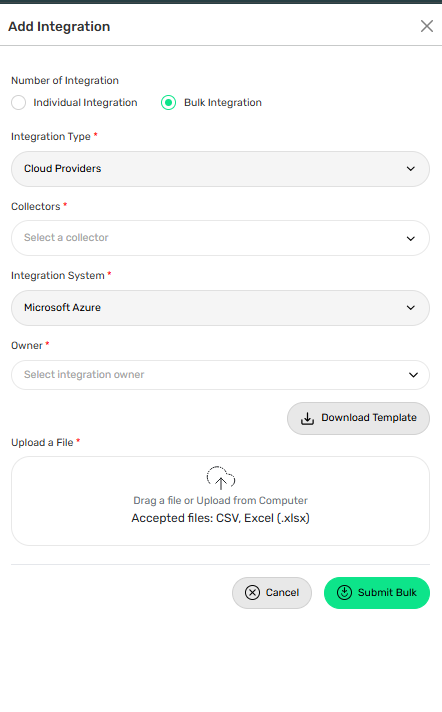
Steps:
• Select Bulk Integration
• Download the template
• Enter the required Azure tenant and credential details
• Upload the completed file
• Click Test Connection
• Save the integration
Troubleshooting Tips
• Verify Tenant ID, Client ID, and Client Secret
• Confirm required Azure permissions are assigned
• Check if the client secret has expired
• Ensure collector connectivity to Azure services
