
.svg)


.svg)

Amazon Web Service (AWS)
Overview
The Amazon Web Service (AWS) Integration allows Cywift to securely connect with AWS accounts to collect cloud asset inventory, configuration details, identity and access metadata, security posture information, and cloud compliance evidence.
Before starting the integration, ensure the following:
• AWS account access
• IAM user permissions to create access keys
• Access Key ID and Secret Access Key
• Required read-only permissions assigned
• Collector configured in Cywift
Step 1: Create AWS Access Keys
To create your own access keys (AWS Console):
- Sign in to the AWS IAM Console using your AWS Account ID (or alias), IAM username, and password.
- Access Security Credentials:
• Click your username in the upper-right corner.
• Select "Security credentials". - Create Access Key:
• In the "Access keys" section, click "Create access key".
• If you already have two access keys, delete one before creating a new key.
• Select "Other" and click "Next". - Optional: Add Description Tag
• Enter a description tag to help identify the access key later. - Retrieve Access Keys:
• Click "Show" to view the Secret Access Key or download the CSV file.
• Save the Secret Access Key securely. It can only be viewed once.
• Click "Done".
Important Notes:
• Use least privilege access whenever possible
• Do not use root account credentials
• Store access keys securely
• Rotate credentials periodically
Step 2: Navigate to Integrations in Cywift
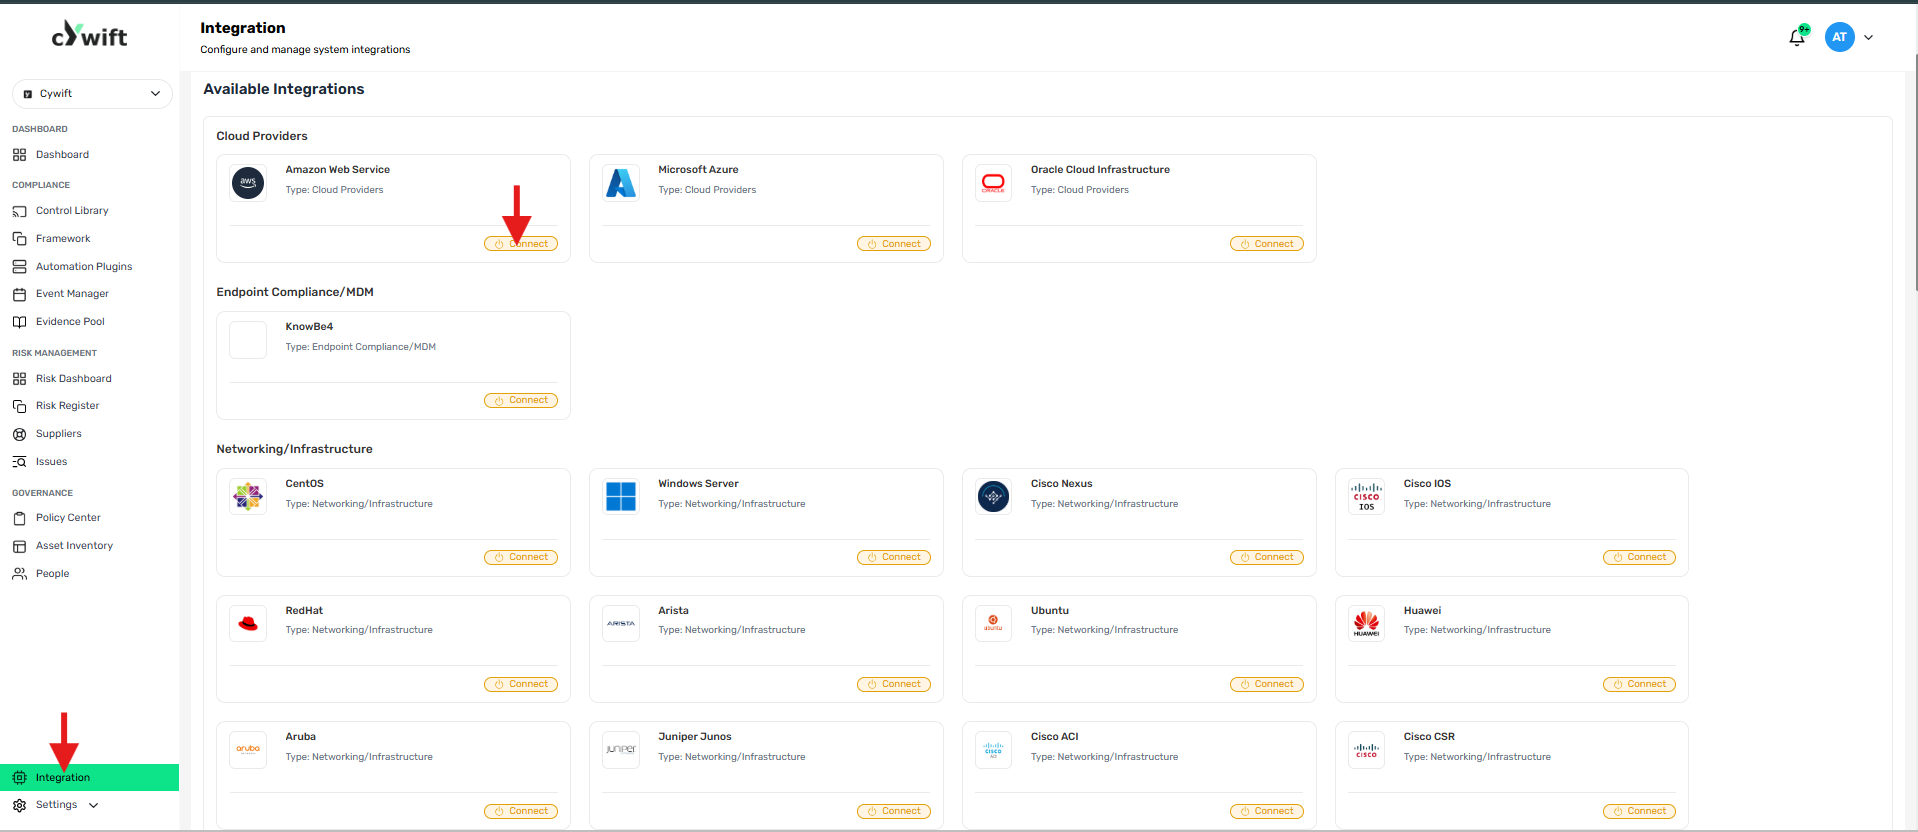
• Log in to the Cywift Platform
• Navigate to Integration
• Select Cloud Providers
• Choose Amazon Web Service (AWS)
• Click Add Integration
Step 3: Add Individual Integration
Use this option when integrating a single AWS account.
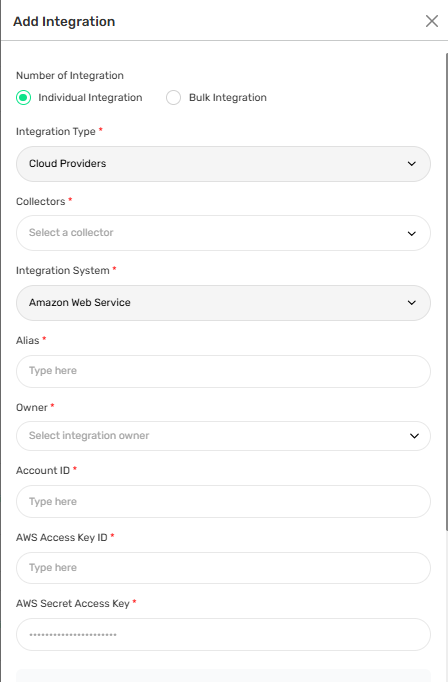
Required Fields:
• Select Individual Integration
• Select Amazon Web Service (AWS) from Cloud Providers
• Select a configured Collector
• Enter an Integration Alias
• Select an Integration Owner
• Enter the AWS Access Key ID
• Enter the AWS Secret Access Key
Step 4: Add Bulk Integration
Use this option to integrate multiple AWS accounts simultaneously.
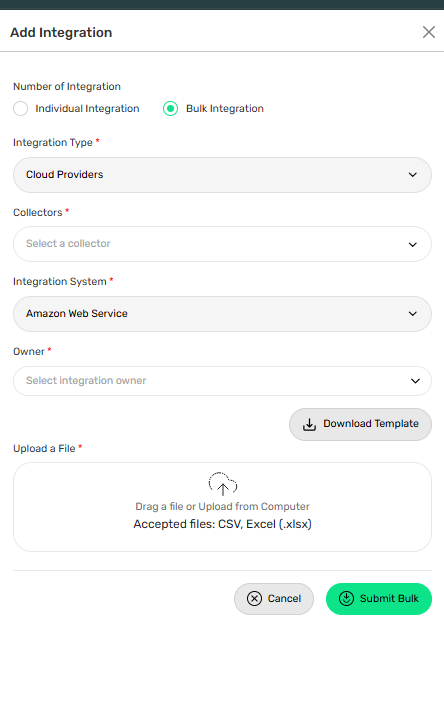
Steps:
• Select Bulk Integration
• Download the template
• Enter the required AWS account details and credentials
• Upload the completed file
• Click Test Connection
• Save the integration
Troubleshooting Tips
• Verify Access Key ID and Secret Access Key
• Confirm IAM permissions are assigned correctly
• Ensure collector connectivity to AWS APIs
• Check AWS account access and authentication
